Botanical Candles
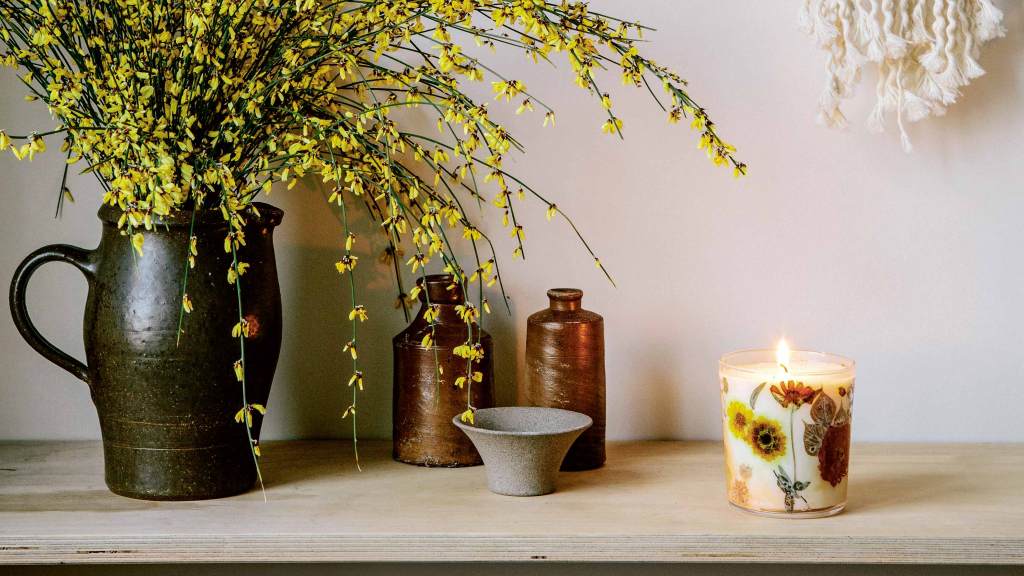
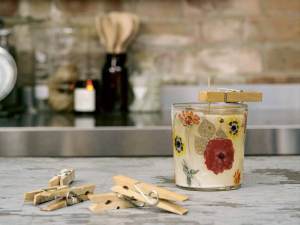
Botanical candles are a lovely way to create a unique aesthetic. By botanical candles, we not only mean a more botanical fragrance profile, but also the decoration of the candle jar with pressed seasonal flora. During this workshop we will give you the expertise to create both elements.
WHAT YOU WILL NEED
- Container soy wax – try EcoSoya
- Advanced or Golden Wax 464 – you’ll need 1kg (21/4lb) to make 5 candles.
- Your oil blend – depending on your profile and choice of oil, you’ll need between 6 and 12 per cent.
- Wicks – you’ll want the right size based on the diameters of the containers you’re using
- Containers – for this exercise, they should be the right size to hold a 200g (7oz) candle and ideally clear.
- Non-toxic PVA glue – to attach the pressed flowers to the inside of your clear container.
- Brushes – for spreading the glue onto the inside of the jar.
- Gloves – to prevent you getting sticky fingers throughout the process!
- A selection of pressed plants – to decorate your vessel with.
You can choose to use any other type of wax base here, too. We recommend using a blend of soy or rapeseed wax with beeswax for this. In other words, you want a wax blend that’s soft to give you a long burn time, but steady enough to make sure it doesn’t melt all the way to the edges. Sounds a bit unorthodox, but it will all make sense along the way. It’s very important to double-check your wick size in accordance to the diameter of your vessels when making a botanical candle – remember, you won’t want a clean burn to the edges of this candle because it will damage the botanical decoration.
We recommend using a clear container here so that you can show off the decorative elements of the botanicals.
As for the oil blend, you could try something that goes with the botanicals you intend to use. A suggestion of a summery scent, for example, could be our citrusy sweet blend below. When blending this scent, read over the scent wheel and scent pyramid chapters:
Top notes: Sweet orange, mandarin or tangerine, lemon and grapefruit
Middle notes: Peach or apricot and palmarosa
Base notes: Vanilla and sandalwood
Once you’re happy with your oil blend, it is time to decorate the jar.
1. Start with measuring out the wax you need and place it in the double-walled boiler pan or a heatproof bowl set over a pan of boiling water. Keep a kitchen thermometer in the part of the pan or bowl with the wax at all times to make sure you’re monitoring its temperature throughout the process. Do not overheat. While the wax is melting, start preparing the oil blend and the vessels you will be pouring into. When decorating the inside of the vessels, as with most things in life, less is more. Start with one area of your container, distributing the glue with the brush evenly on the inside. You only want a thin foundation layer.
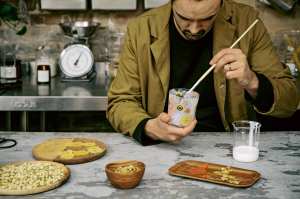
- From then on, dip into your glue, then with the brush select and pick up the blossom or leaf you want to attach first, manoeuvring the brush then placing it onto the first area of your container. Once in place, apply the glue all over the botanical, making sure it’s lying flat against the inside of the vessel. Avoid double layering botanical and leaves. Repeat with your botanicals until you’ve got the desired effect. Think about using repetitive patterns or colour coordinate your petals and leaves. Using your glue gun or stickered wicks, attach the wick to the base of the vessel, making sure it is centred in the jar. You can use a straw to help you fix the wick to the base. Repeat for the other vessels. You can now measure out the scent combination you have created. You will need a digital jeweller’s scale for this, to ensure the blend is accurate.
TIP
Instead of glue, you can also use melted vegetable wax to apply the botanicals to the inside of the vessel. Simply dip your botanicals into your wax using tweezers, then use a brush to press them onto the inside of your container.
- By this point your wax should have melted. Check to make sure the temperature is between 65 and 75°C (149–167°F). Pour the wax into one of the metal jugs and let cool a little. Once the temperature of the wax is at a steady 65ºC (149°F), you can add your oil blend. Pour it in, stirring slowly clockwise and then anti-clockwise to ensure a thorough blend. We recommend then pouring it into the second metal jug and repeating this process to ensure an evenly distributed blend of oil and wax. Once the glue has dried and your wax is blended and ready to go, you can begin to pour it into the vessels.
- Place your wicked jars at even intervals on a tray or on a work surface covered with greaseproof paper. Push the wick away from the direction of the pour to the side of the vessel. Make sure you’re extra careful when it comes to pouring and take care when it comes to the temperature. You don’t want to work with wax that’s too hot as it might cause the petals, leaves and blossoms to come off straight away.
- You can pour in the wax to the desired height of the vessel (we recommend leaving 5mm from the rim of the vessel, which is the perfect wick height – this is especially important if you are using containers with lids), or you can pour three-quarters of the way up to allow for a top pour once the vessel has set. Remember, for this particular candle you don’t want a clean burn as you need a safety rim of wax going all around the jar, to ensure your decorations remain intact. Once you’ve poured your candles, bring the wick gently back to the centre and use the pegs to fix the wick in the centre of your vessel. Create some friction between the peg and vessel to ensure the wick stays in place as the wax sets. You can do this by pushing the peg against the jar and pulling the wick ever so slightly at the same time. If a botanical comes away and floats in your melt-pool while burning your candle, blow out the flame and pick out the item, as it can become highly hazardous if left to catch.
TIP
If you want to use botanicals from your garden, feel free to do so. Just remember that you want them dried and pressed, not just dried. You can, for instance, harvest lavender at the end of July, press it over the summer and then use it in lavender- scented candles later in the year. Simply place the blossom or leaves in a book and let them dry and become pressed over time.
Project from The Scented Candle Workshop by Niko Dafkos & Paul Firmin from Earl of East.