Gingerbread Shed
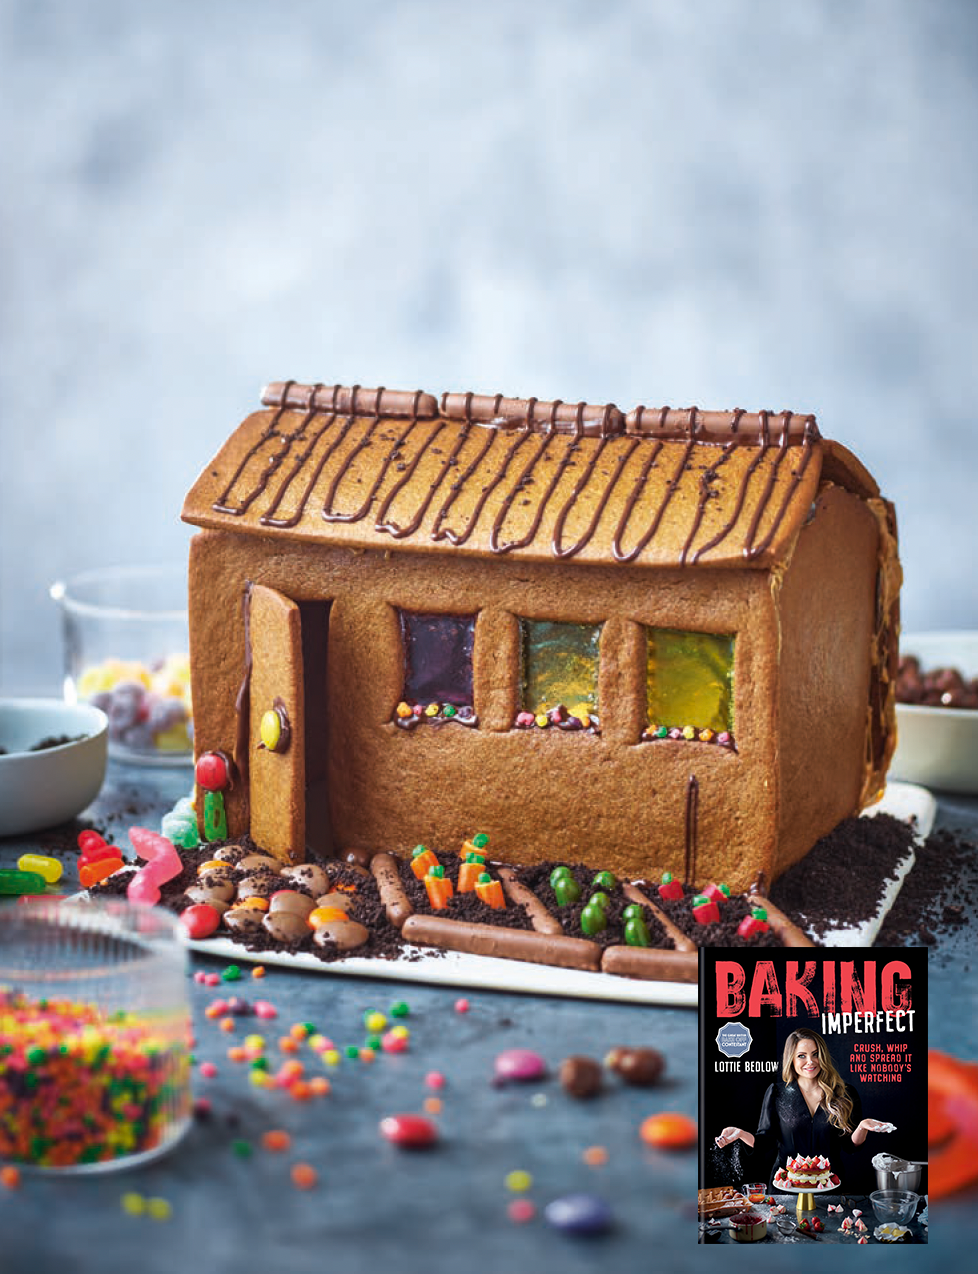

This is the closest I’ll ever come to owning property. I’ve never been able to make anything from gingerbread that was worthy of being called a ‘house’, so I’ve scaled back my expectations to a shed. Which, in retrospect, is essentially just a smaller house. But at least it sounds less Christmassy and can be made all year round. This is a real opportunity to get creative. I’ve given you the right quantities and measurements here, but everything beyond the structure is up to you, so decorate it however you like. There should even be a little bit of extra dough for making some gingerbread people, or gingerbread flowerpots or a gingerbread lawn mower etc. FYI, assembly is easier with an extra pair of hands. – Lottie Bedlow, author of Baking Imperfect
KIT LIST
2 or 3 baking sheets, ideally, if not 1 will do
hand whisk
palette knife
plus whatever you need for decorating as you like, such as piping bags
Ingredients
250g (9oz) dark brown soft sugar
150g (51 2oz) unsalted butter
85g (3oz) golden syrup
500g (1lb 2oz) plain flour, plus extra for dusting
1&1/2 teaspoons bicarbonate of soda
3 tablespoons ground ginger
1&1/2 teaspoons ground cinnamon
1 teaspoon mixed spice
1/2 teaspoon salt
a few twists of cracked black pepper
1 large egg, beaten
3 coloured boiled sweets, for the windows
150g (51 2oz) butter candies (I use Werther’s Original Butter Candies)
icing sugar, for making water icing (optional)
anything you fancy to decorate your shed, sweets, candyfloss, edible moss etc.
1. Heat the sugar, butter and golden syrup in a large saucepan over a low heat and stir until the butter has melted. Remove from the heat and set aside.
2. Sift the flour, bicarbonate of soda, spices and salt into a large bowl, add the cracked black pepper and stir together with a hand whisk. Pour the sugar and butter mixture into the flour mixture and stir to combine. Add the beaten egg and stir again.
3. Flour a work surface, turn the mixture out on to it and bring together with your hands to form a dough. Once you are happy that the dough hasn’t got any streaks of flour in it, wrap in clingfilm and rest in the fridge for a minimum of an hour.
4. Preheat the oven to 200C/180C fan/400F/Gas Mark 6 and line 2 or 3 baking sheets with nonstick baking paper (don’t worry if you only have one – the process will just take a little longer).
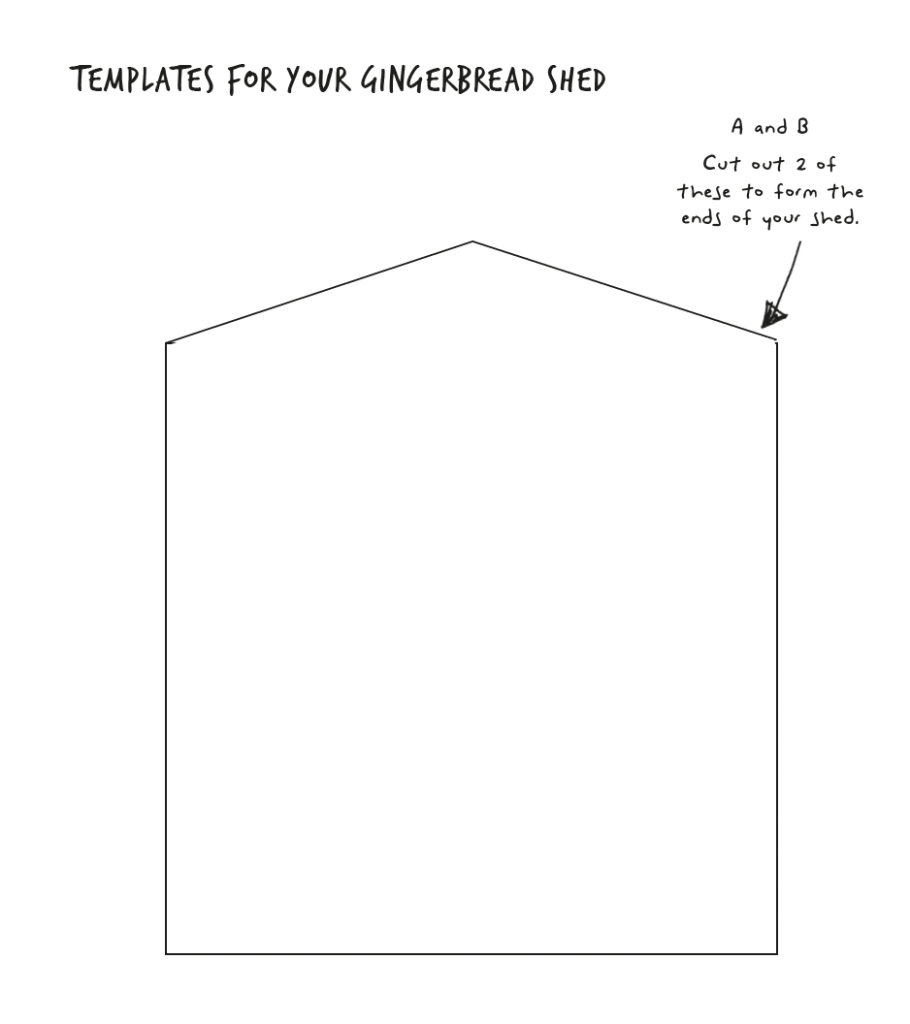
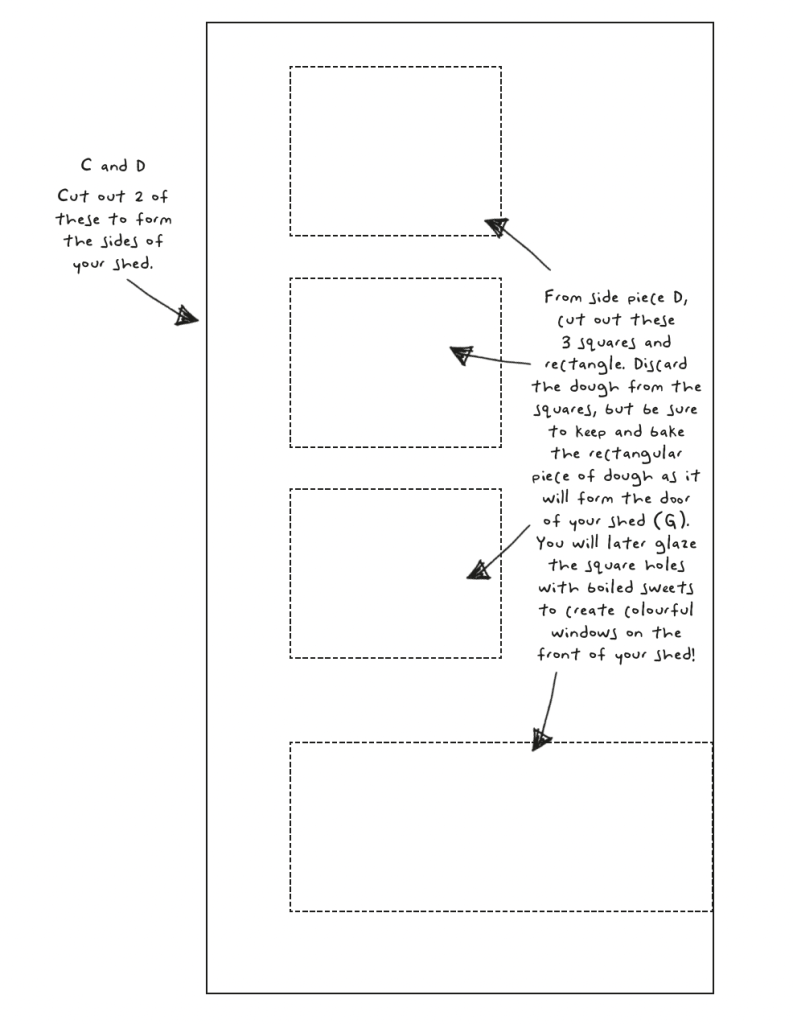
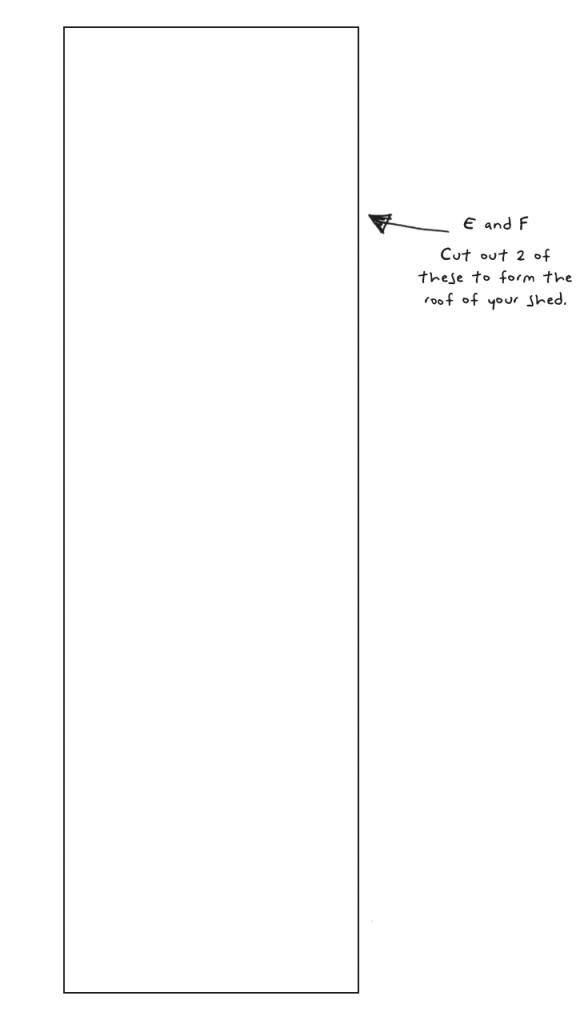
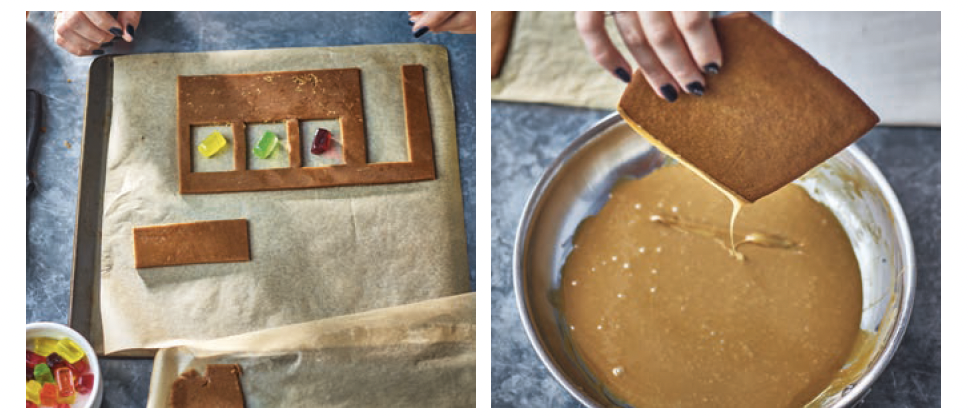
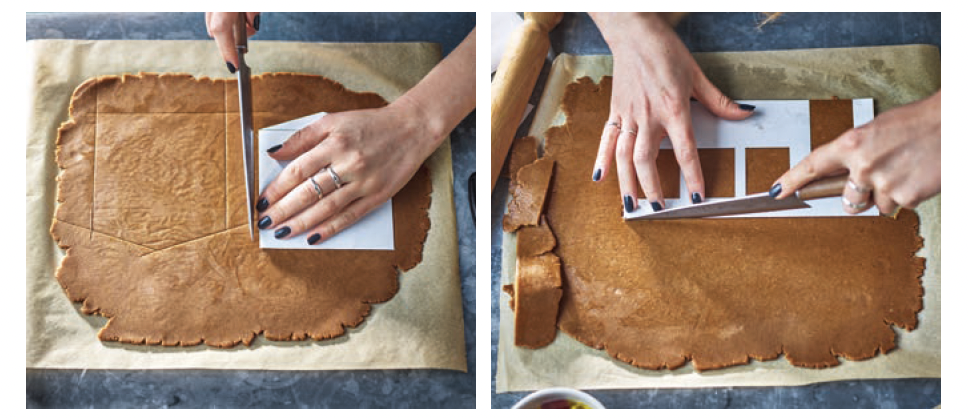
5. Flour your work surface and roll out the dough to a thickness of about 2–3mm (1 8 inch). Create your own templates from those given on pages 195–7, and use these to cut the shed sides, roof, windows and door from the gingerbread. I find it helpful to do this on the nonstick baking paper, as you can then easily transfer the whole thing to your baking sheets.
6. Place a coloured boiled sweet in each window hole – the sweets will melt and give you a windowpane, while reinforcing the structure of that section.
7. Bake each piece for 10–12 minutes. Remove from the oven and leave to cool completely on the sheets before moving the gingerbread pieces, as they will still be soft.
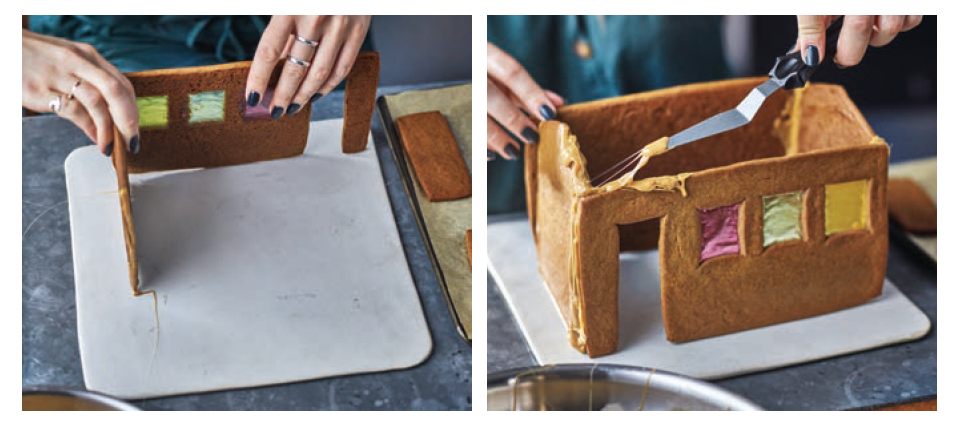
8. Once all the gingerbread pieces have cooled, make the glue to stick them together. Melt the butter candies in a large saucepan over a medium heat. This is VERY sticky and VERY hot, but it saves faffing about with caramel. Throughout assembly you’re going to need to play around with the heat to make sure the glue stays melted but doesn’t burn. Carefully (and I mean EXTREMELY CAREFULLY) stick the sides of A, B, C and D together (as shown on page 198). Keep holding the pieces in place until the glue sets. To attach the roof sections E and F, use a palette knife to spread a little glue on the top edges of A, B, C and D before pressing the roof sections gently on, one at a time, so they meet in the middle. The glue sets almost instantly, so do this as quickly as possible or it will harden on your knife.* Attach the door piece G along the side of the door hole in D (I like to have mine slightly ajar).
9. I assemble and then decorate, but there’s no rule to say you couldn’t decorate and then assemble. I think I just worry that if I’ve put loads of effort into decorating it and then it snaps when I stick it together I will be doubly sad. So pipe whatever you like with water icing (made using equal quantities of icing sugar and water mixed together until smooth): hinges on the door, window frames etc, and go crazy with the sweets, or keep it nice and simple. Remember this is just a shed after all.

This is an extract from Baking Imperfect by Lottie Bedlow.
Related Posts
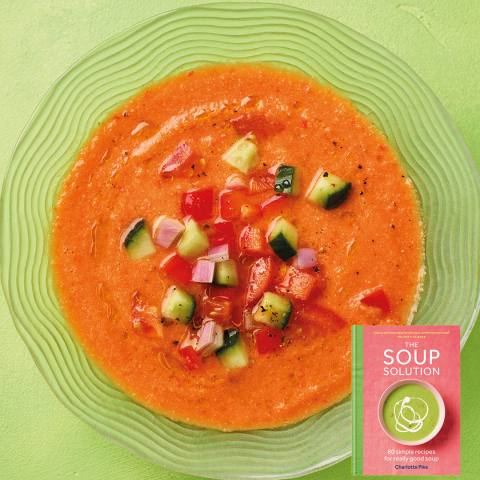
Gazpacho (VG) from The Soup Solution
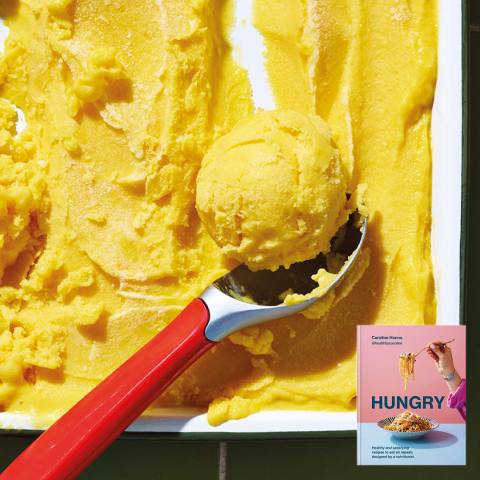
Two-Ingredient Mango Ice Cream (VG) from Hungry
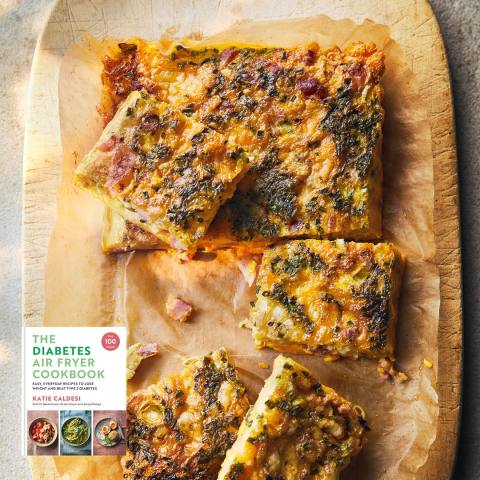
Bacon, Spring Onion and Smoked Cheese Frittata from The Diabetes Air Fryer Cookbook
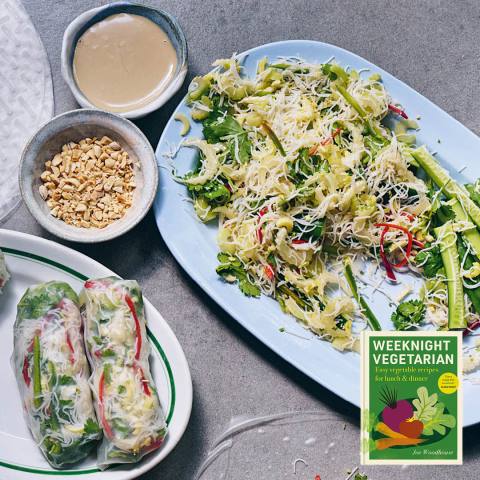
Tiger Salad Summer Rolls with Double-Dunk Sauce (V) from Weeknight Vegetarian
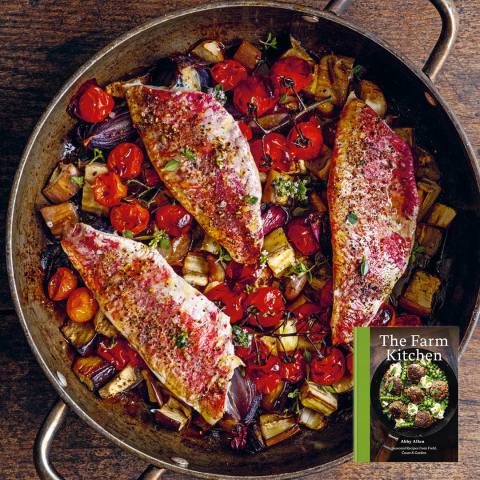
Roasted Red Mullet with Cherry Tomatoes, Aubergines and Thyme