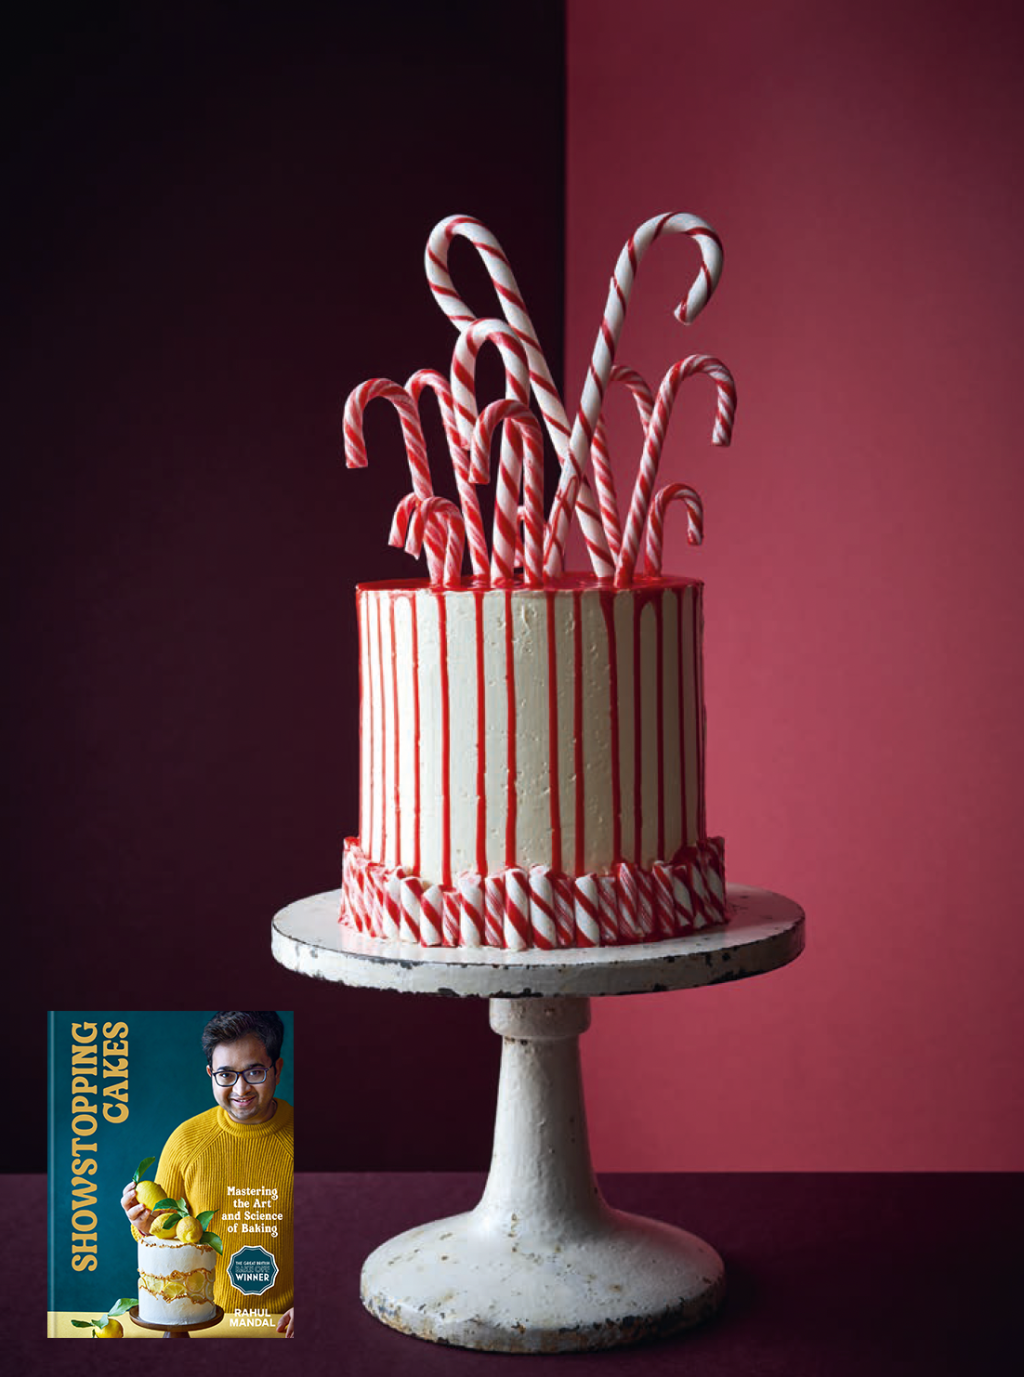
Chocolate, orange and mint candy cane cake

I first made this cake as a present to the staff of Rotherham Leisure Complex. Since I moved to Rotherham in 2015, some of the staff have became close friends. Also, they got to taste a lot of pre-Bake Off cakes – it was like a weekly ritual. In a sense, it is my way of thanking them for becoming my friends and giving me company when I was new to Rotherham. – Rahul Mandal, author of Showstopping Cakes

Serves ✿ 6–8
Bake 45–50 minutes
Ingredients
For the chocolate, orange and mint cake
120ml boiling water
100g cocoa powder
zest and juice of 2 oranges
500g caster (superfine) sugar
200g Greek yogurt
150g salted butter, at room temperature, plus extra for greasing
5 medium free-range eggs
300g self-raising flour
1/2 teaspoon baking powder
3 tablespoons finely chopped mint leaves (or 1&1/2 tablespoons dried mint)
1 teaspoon peppermint extract
For the peppermint buttercream
250g unsalted butter, at room temperature soft
475g icing (confectioner’s) sugar (sifted)
1–2 tablespoons whole (full-fat) milk
1&1/2 teaspoons peppermint extract
4–5 candy canes, crushed
For the peppermint drip
75ml double (double) cream
100g white chocolate, chopped
red food colouring gel
1/2 teaspoon peppermint extract
For assembly and decoration
2–3 red-and-white spiral lollipops
20–25 candy canes
Method
To make the chocolate, orange and mint cake
1. Preheat the oven to 180C/160C fan/350F/gas mark 4. Grease three 15cm (6in) cake tins with butter and line with baking paper.
2. In a large mixing bowl, whisk together the boiling water, cocoa and orange zest and juice using an electric whisk until well combined. Scrape down the sides of the bowl and add the remaining cake ingredients, then whisk for about 1 minute. Scrape down the sides of the bowl once more and whisk for another 30 seconds.
3 .Divide the batter equally between the prepared tins and bake for 45–50 minutes until a skewer inserted into the middle comes out clean.
4. Remove from the oven and let the cakes cool in their tins for 10–15 minutes before turning out on to a wire rack to cool completely.
To make the peppermint buttercream
5. In a mixing bowl, beat the butter using an electric whisk for about 5–10 minutes, scraping down the sides of the bowl from time to time. The colour of the butter should transform from yellow to pale cream as you keep whisking.
6. Sift in half of the icing sugar and mix very well for about 5 minutes, then scrape down the sides of the bowl and add the rest of the sugar. Whisk well for another 5 minutes.
7. Add 1–2 tablespoons of milk, depending on the consistency of the buttercream, and mix well, then add the peppermint extract and whisk to combine.
8. Remove about a third of the buttercream and place in a separate bowl, along with the crushed candy canes. Mix to combine: this will be the filling. The other two-thirds of the peppermint buttercream will be used for coating the cake.
To make the peppermint drip
9. Place the cream and white chocolate in a microwave-safe bowl and microwave on high power in 30-second bursts until the chocolate is melted. Add the red food colouring and mix well. Pour into a piping bag and set aside until needed.
To assemble and decorate
10 Use a little of the peppermint buttercream to secure one of the sponges on a 20cm (8in) cake board or cake stand and place on a cake turntable. Spread half the candy cane-filled buttercream on top, smoothing it out using a small spatula, then top with the second sponge. Spread this with the remaining candy cane-filled buttercream, then top with the third sponge.
11. Coat the sides and top of the cake with a crumb coating of the peppermint buttercream, then chill in the fridge for about an hour.
12. Remove the cake from the fridge and use the remaining buttercream to give it a final, smooth coating. Return the cake to the fridge for a further 30 minutes.
13. Cut 10–15 of the candy canes into small pieces and arrange them side by side around the base of the cake, pressing them into the icing.
14. Cut a 2–3mm (1/16–1/8in) hole in the end of the piping bag filled with the drip mixture and pipe some drips down the sides of the cake. Pour the rest of the drip mixture on top of the cake and smooth it out. Return the cake to the fridge for another 30 minutes to set.

15. Once set, remove the cake from the fridge and decorate the top with the remaining candy canes.
16. This can be kept in the fridge for a few days. While storing, take the candy canes off to save some space..
This is an extract from Showstopping Cakes by Rahul Mandal